






















Tupperware boxes and drawer organizers offer plenty of room for good stuff, but good stuff rarely comes out of the closet. Silver cutlery collects dust there. The reason is universal. That gray mist that covers every fork and spoon? It is oxidation. It is stubborn. It discourages the best intentions of anyone who just wants to have a nice dinner on a Sunday. Who really wants to spend an afternoon scrubbing every piece with chemical paste that smells like a chemistry lab?
There is a forgotten method. It works as well as any professional goldsmith could do. It requires no elbow grease. No need for expensive products. Science has updated this grandmother’s trick to promise a shiny finish in minutes. Forget the blackened rags. Forget about physical exertion. A simple chemical reaction does the work for you.
Зміст
Ingredients you already own
No trip to the store is needed to restore dull objects. You don’t need toxic doses of industrial cleaner. The solution can be found in the kitchen cabinets. You probably now have everything you need to reverse the darkening. The approach is based on amazing simplicity. We use elements that every household has. When you look at home maintenance through the lens of ingenuity, it’s no longer a chore, but a quick task.
You need three products. Heat-resistant container. Normal aluminum foil. Baking soda. This trio may seem ordinary, but it’s the basis for radical, eco-friendly cleaning. It respects your respiratory system. It respects the environment. It’s a stark contrast to the harsh solvents you typically find under the sink.
Understanding the mechanism increases the weight of the result. The darkness of silver is not dirt. It is silver sulfide. This layer is formed when the metal reacts with the sulfur in the air. When you rub with traditional polish, you physically remove the layer. You are also removing a tiny bit of silver. The immersion method works differently. It reverses the reaction.
In warm water, baking soda acts as a conductor. It produces a small electrochemical current. Aluminum is more reactive than silver. It attracts sulfur atoms to itself. The oxidation leaves your cutlery to attach to the foil. This molecular transfer thoroughly cleans the object deeply without abrasion. Your most valuable items will remain intact.
Five minute change
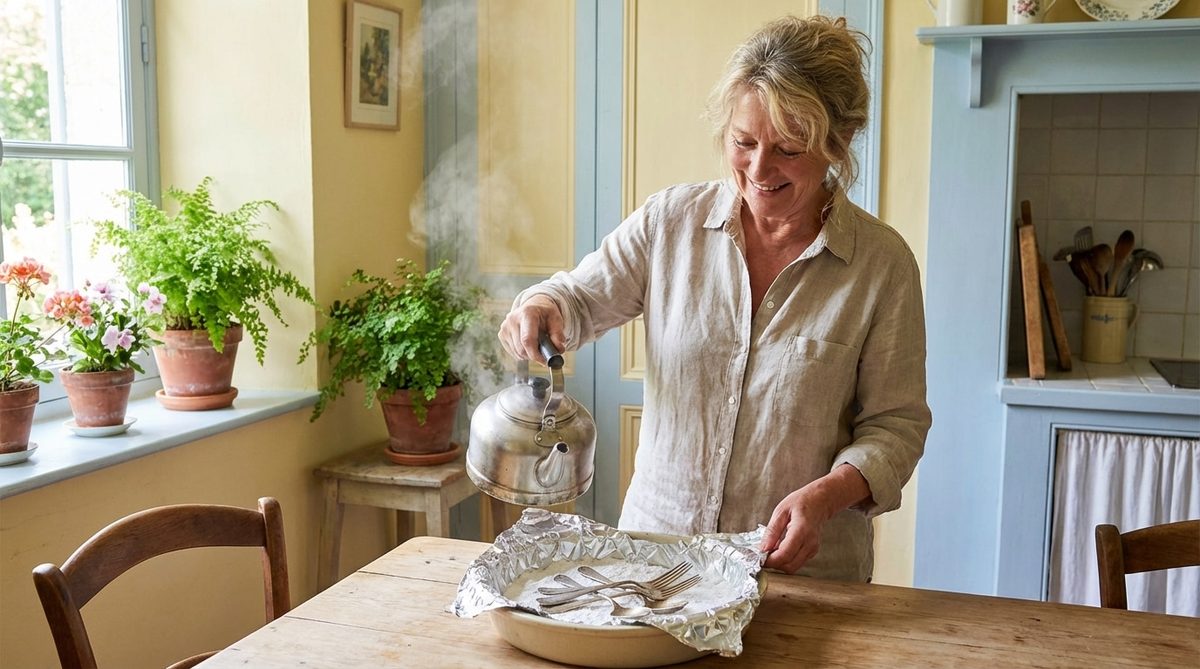
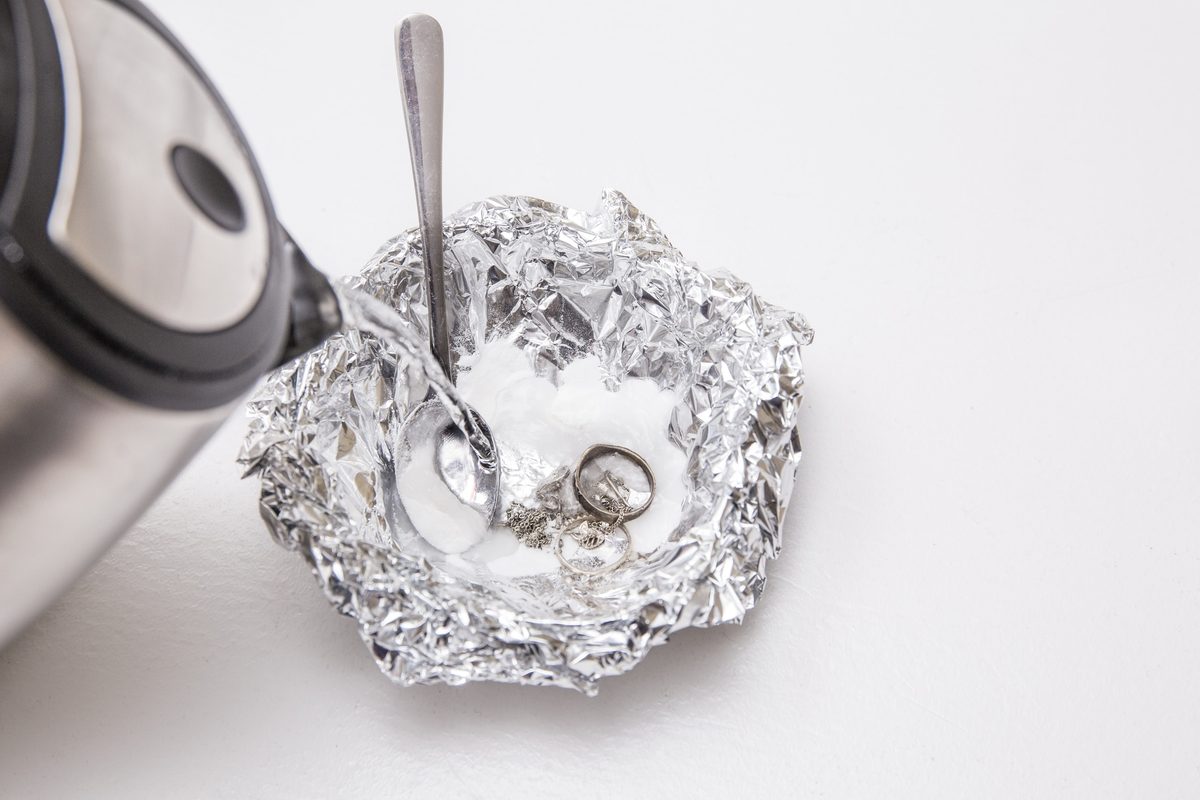
The process is faster than you think. Prepare a heat-resistant container. Line with aluminum foil. Glossy or matte doesn’t matter to the reaction, but some prefer the matte side up. Place your tarnished silver inside. Make sure the metal is in direct contact with the membrane. Contact is key for the electron exchange.
Sprinkle a generous amount of baking soda over the items. The ratio is not strict, but enough to cover the parts helps. Pour hot, but not boiling, water over everything. You will immediately see the formation of bubbles. This is where the reaction starts. Sulfur moves from silver to aluminum.
Look at the change. The gray disappears. White is back. Let it sit for just a few minutes. If the staining is severe, you may need to change the water and foil, but a short soak is usually enough. Rinse the silver thoroughly. Dry it with a soft cloth. You are left with bright, reflective metal. No rubbing. No smell. Just a clean plate and a clean conscience.
Chemical reaction: How the method is carried out
Think of it less like cleaning and more like a chemical experiment you can do on your kitchen counter. Speed is your friend here. You’re dealing with a process that takes less time than brewing a pot of tea. But you have to respect the sequence of actions. If you mess up the order, you’ll just end up with a mess.
Clear your work area. You need room to breathe. Place a heat resistant mat under your bowl. This mixture produces significant heat. It is not a warm bath; it’s a reaction.
Gather your materials:
– Aluminum foil. Enough to line the bottom of the dish. Glossy side up is the default setting, although some argue that this has no effect on the reaction itself. Stick with the shiny side up for consistency.
– baking soda. One level tablespoon per liter of water.
– Boiling water. Enough to fully submerge your silver.
– Glass or ceramic bowl. Do not use metal. You need an inert container. Aluminum bowls interfere with the electrochemical process you want to initiate.
The science of sulfide removal
As soon as the boiling water hits the baking soda and aluminum, you will immediately see foaming. Bubbles rise aggressively. This is a sign that the galvanic reaction has started.
You may notice a smell. It resembles rotten eggs. Don’t panic. This escapes hydrogen sulfide. This means that the sulfur leaves the silver and moves to the aluminum. Look carefully. The foil turns black. The silver becomes visibly brighter.
Three to five minutes are enough for a standard tarnish. If the piece is strongly oxidized, you can extend the soaking time a little. The real magic happens in the cracks. In places where the polishing cloth can never reach. That’s where the solution comes in. Just look. It’s strangely satisfying to see dirt disappear in filigree without touching it.
Precautions for sensitive items
This method is effective, but not universal. You need to know what you cannot clean with this method.
Avoid jewelry with precious stones or decorative stones. The thermal shock of boiling water can break certain gemstones. It can also loosen the adhesives that hold the settings in place. Glue is often used on old knife handles. This method will likely loosen them.
Be careful with intentionally oxidized silver. Silversmiths often darken certain inlaid areas to create contrast and depth. This chemical bath removes all stains. It removes intentional darkness. Your piece looks flat. Visually flat.
Reserve this technique for solid silver flatware, trays, and simple jewelry. Check your product first. If it has stones, glue or an intentional patina, do not use this method. Use traditional silver cloth instead.
The crucial last step: rinsing and drying
Soaking is complete. Now we have to act quickly. Use wooden or plastic tongs to remove objects. Metal tongs conduct heat. You don’t want to burn your fingers or scratch fresh silver.
Rinse thoroughly. Use cool or lukewarm water. You need to wash off all baking soda residue and dislodged sulfur particles from the metal. If you leave the remains, it will be deposited again. You spot your clean silver before you dry it.
Dry immediately. Use a soft microfiber cloth or cotton cloth. Wipe vigorously. Remove all traces of moisture. Water stains are the enemy of shine. This step seals the cleanliness. It protects the silver for weeks.
When you’re done, the metal looks amazingly bright. Like new. You got a professional result for almost nothing.
Restoring the silver does not require brute force. It’s about understanding chemistry. This gentle, scientific approach will help you extend the life of your heirlooms. You save yourself the trouble of scrubbing. When you set the table next weekend, show the history, not just the cutlery. The gloss is ready. The question is: will you use it?